Contents
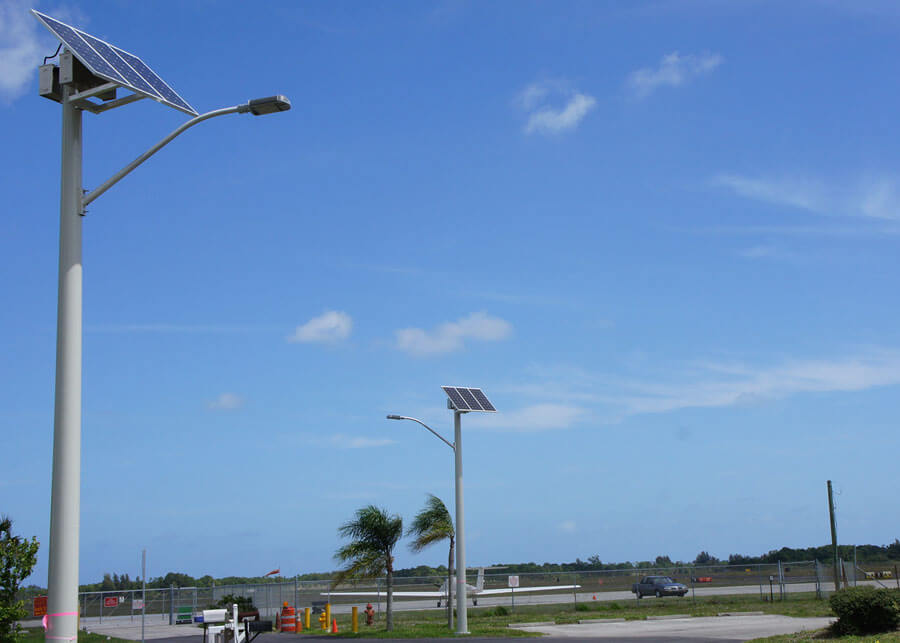
 There are many components involved in creating a commercial solar street light system. What components are used to manufacture the system can make or break a system over time. Here is a quick overview of what components are used in most typical solar street light systems. Note that not all manufactures use the same components in their solar street lighting systems.
Solar Panel Assembly
The solar panel assembly is comprised of three main parts; the solar panel assembly, the mounting bracket and hardware. There is no simple way to just stick a solar panel on a pole. Brackets and mounting apparatuses are required to make this happen. A raw solar panel is only comprised of the solar cells, glass and framework. In addition to that, a mounting solar bracket assembly must be installed on the solar panel to attach to a pole. Using an all aluminum bracket design with stainless steel hardware will ensure that your solar panel assembly will stand up to the test of time, especially in harsh environments that are prone to rust and degradation. We even suggest making sure the rear of the panel is protected by a vented panel pan for additional protection against wind-blown debris and vandalism.
Solar Battery Assembly
The solar battery assembly includes the batteries and wiring to hook to the solar panel assembly and light fixture. The batteries need to be sized for a minimum of five days autonomy to provide a longer life span for the batteries, typically five to seven years, while also providing energy to the system when there is little or no sun due to inclement weather. The battery assembly should be housed inside a vented aluminum battery box to provide heat ventilation and preferably located under the solar for additional shade so the batteries don’t get overheated. New designs also allow for lower battery box mounting with locked boxes to provide easier access for maintenance requirements; however, if sized correctly, this is only every five years or more.
Light Controls
The light controls are located typically inside the battery box and provide the on and off functionality of the solar street light system. The controls also operate the correct profile of the system for customization of run times. The light controller also should provide a low voltage disconnect (LVD) in case the battery gets drained to a critical point to make sure the battery does not ever go down to zero, again increasing the life of the battery system. There are many light control options ranging from dusk to dawn, dusk for a number of hours, split time and beyond. Talk to your solar lighting professional for project specific controls.
Solar Light Fixture
Today LED fixtures are the most popular pairing for the solar power assembly when it comes to solar street lights; however, other lamp options are still available. The light fixture should provide the needed light levels on the ground for easy visibility while providing the most efficient lighting as possible. Picking out the style of fixture, distribution pattern and light level requirements is the first step to ensuring you will get the solar lighting system you need for your street lighting application. LEDs broaden the range of style fixtures from standard street light Cobrahead fixtures to decorative pendant style fixture and everywhere in between, while also providing better lighting levels at a much lower wattage.
Fixture Mounting Bracket
The fixture mounting bracket is provided to mount the fixture to a pole for a set length. The fixture mounting bracket can range from a few inches, such as the side of pole tenon bracket which is 5 inches to 2 feet, to quite a few feet out from the pole, such as the side of pole bracket which is typically 4 to 8 feet, but can come in lengths up to 12 to 15 feet if required. The fixture mounting bracket will set the fixture out away from the pole to provide the light where it is needed on the ground while providing the needed setback of the pole off the roadway. The bracket can be straight, have an upsweep, or can even be decorative depending on the architectural needs of the lighting project.
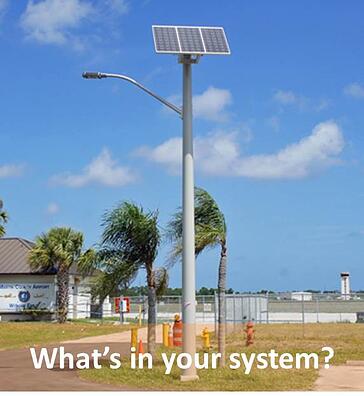
Pole
The pole is the final component to any successful solar street light system. The pole needs to be strong enough to support the solar and tall enough for the solar to mount above the fixture, but ensuring the fixture is mounted at the correct height for the best light spread on the ground. In certain areas, the pole needs to meet AASHTO wind load requirements with the solar. The poles are available in aluminum, steel, fiberglass composite or concrete and can be either direct burial or anchor base. Transformer base poles can also be used for some applications. Understanding what goes into the pole design can ensure that your pole will standup to the test of time.
There you have it. Understanding what is involved in creating a commercially produced solar street lighting system will allow you to judge exactly what you get when speaking to the manufacturer. All components should seamlessly fit together and work flawlessly for years to come.
Editor's Note: This post was originally published in May 2014 and has been completely revamped and updated for accuracy and comprehensiveness.