Contents
In the beginning, there was light. That light used to be the only source of light for millions of years. Then we harnessed the power of fire to produce light at night. This provided a way to stay up past the sun using fires and candles.
In the last hundred plus years, we have found a way to produce another form of light using electricity. During the industrial revolution, we were able to produce all sorts of things. We retrofitted our homes, offices, and many outdoor spaces with electricity to provide power for lighting, appliances, and many other applications.
Today, we still use much of this same technology; however, rural areas and areas looking for a solution due to lack of electricity in an area or their work to help with current global warming problems are turning to a renewable energy source for many applications such as power production. In addition, off-grid solar lighting systems are gaining popularity since they can provide a green solution for many outdoor lighting installations.
Let’s take a deep look at what solar lighting is, what are some pros and cons of a solar system, and some other great things about solar lighting. This will give you an in-depth look at what solar lighting is and how you can utilize an off-grid solar LED lighting system for your next installation.
Solar LED Lighting Terminology
There are many terms in the solar and lighting industry that are not common. Below is a list of terms and their basic definitions to ensure that there isn't missing information when talking to someone in the industry since these terms are more common in the solar and lighting industries.
Watt
A quantifiable measure of power consumed. For example, if you have a 15-Watt lamp, it consumes 15 watts per hour. The lower the watt, the less energy used, and LEDs provide the most light with the lowest wattage necessary. Watts does not equal the amount of light, only the energy consumed.
Lumen
A lumen is the amount of light given out through a solid angle by a source of one-candela intensity radiating equally in all directions. Basically, the amount of light given off by a lamp/bulb is measured in lumens. Not all fixtures or lamps are created equal, and each setup has a different lumen output.
Foot Candle
A foot-candle is a unit of illumination given by a source of one candela at a distance of one foot square. This measurement is used to determine how much light is available at a specific point, typically at ground level. For example, one foot-candle represents the amount of light that a single candle would put off one foot away from the candle in a one square foot area.
Kelvin Kº (colors of light)
A Kelvin refers to the colors of light and is measured in degrees. You can get anywhere from bright white light at 6500K to a softer yellow light at 3000K, even a dark yellow for turtle-friendly applications which is lower than 2500K. For simpler terms, most kitchens and office spaces are illuminated by whiter light, closer to that of the sun, where living spaces can use warmer colors.
Color Rendition Index (CRI)
The CRI is a way to assess how light sources make objects appear. Any CRI greater than 80 has good color properties and is closest to the light provided by the sun. Lower CRI makes it harder for the eyes to see details such as colors.
Mounting Height
The mounting height is the height at which the fixture or lamp is installed. In many cases, a fixture's mounting height is arbitrarily chosen when it plays a large role in distributing the light and number of foot candles it can provide. For example, the closer to the ground, the less spread available; however, too high of a mounting height, the lower the foot candles are under the fixture.
Light Distributions
The light distribution pattern determines how far light is emitted on all sides of a fixture. This can be annotated in Types or NEMA patterns, and each has its various applications that they are best suited for.
Optics
This is the control of light distribution from a fixture, sometimes controlled by aiming the light or using a shield to direct the light a specific way and creates the various distribution patterns. This can also include non-cutoff where light is emitted in all directions, semi-cutoff where the light is emitted below 90 degrees, cutoff where less than 2.5% of the light is allowed to escape the fixture above 90 degrees, full-cutoff, which is used for dark sky applications.
Amps
Amps is a unit of measurement to determine the amount of electrical charge passing a point in an electrical circuit. This is typically used to determine the amount of power generated by a solar panel to charge the battery and how much power can be stored in a battery. For example, an 85-Watt panel produces a 5-amp charge per hour and charges an 82 amp hour battery that holds up to 82 amps at one time. For this example, it would take 16.4 hours for an 85-Watt panel to charge an 82 Amp hour battery from dead.
Current
The current indicates the flow of electrical energy. Solar produces DC (Direct Current) power and can run DC electrical devices directly without using an AC power supply. Like most electronics, LEDs naturally run from DC current and do not require an inverter or ballast to create an AC current for these fixtures. This is the most efficient way to power a solar lighting fixture or most small electronic devices such as cameras.
Autonomy
The number of days storage an off-grid system has for times of bad weather or low sun. This can be determined by calculating the number of amps used per day divided by the number of amps in a battery backup system. A minimum autonomy should be provided to ensure that the system performs as expected on a daily basis and system failures are avoided.
Depth of Discharge
The amount of power pulled from a battery; i.e., if the battery is fully charged, its depth of discharge is 0%, if it has been used 25% to light a fixture, then the DOD is 25%, etc. Depending on the battery technology, the depth of discharge varies between battery types. Making sure that you don’t over-drain the battery beyond its optimum depth of discharge ensures a long lifespan.
Solar Insolation
Solar insolation stands for the amount of solar radiation that hits a horizontal surface over a specified time for a given location. This varies greatly from one place to another, from less than 1 sun hour in some northern climates to 5 in some deserts and areas on the equator. The amount of sun availability in a specific location determines how much solar power is required to operate a load, typically determined in Watts or Amps.
Understanding CRI
One thing we touched on is CRI – Color Rendition Index. This is the quantitative measurement used to determine the color of a lamp’s light. The higher the CRI, the truer to sunlight the light is and the better sight you will have when trying to see details. Different CRI can be used in different settings for different reasons. Here is a few of those:
Indoor Lighting
Most indoor home lighting should provide a softer, warmer light, typically around 3200 to 4500 Kelvin, and have a CRI of around 60. This provides good lighting levels while also not being so bright to wash out the surrounding area if reading or an indoor office setting, brighter lights, on the spectrum of 5000 Kelvin to 6500 Kelvin and a CRI of 80 or greater is typically used to mimic sunlight in an office setting, especially those with no available sunlight from windows or skylights.
Outdoor Lighting
For outdoor lighting, staying closer to sunlight, from 4500 Kelvin up to 6500 Kelvin, and a CRI of around 70-80 for nighttime lighting provides the best sight. In addition, bright white lighting at night outside can allow you to see your keys if you drop them to more details of objects in the distance. This is important for the safety and security of areas around homes and businesses.
There are instances, such as coastal and wildlife-friendly areas, requiring a much lower CRI, say around 30-40, due to the long wavelengths of the light. The longer wavelength still allows humans to see, but animals typically do not notice these lights, especially sea turtles and migrating birds.
Different Lighting Colors for Different Tasks
A study on the Effects of LED Color Temperature on Office Workers shows that people prefer a warmer light indoors when dealing with relaxing activities; however, a higher CRI when dealing with task-specific activities such as reading or office work. In addition, participants in these studies have indicated that they are less fatigued in brighter, whiter-lighted areas than warmer light and felt more eye fatigue.
Overall, the lighting CRI in the different areas can affect your productivity and visibility. Choosing the appropriate light color can impact how you see as well as your energy levels.
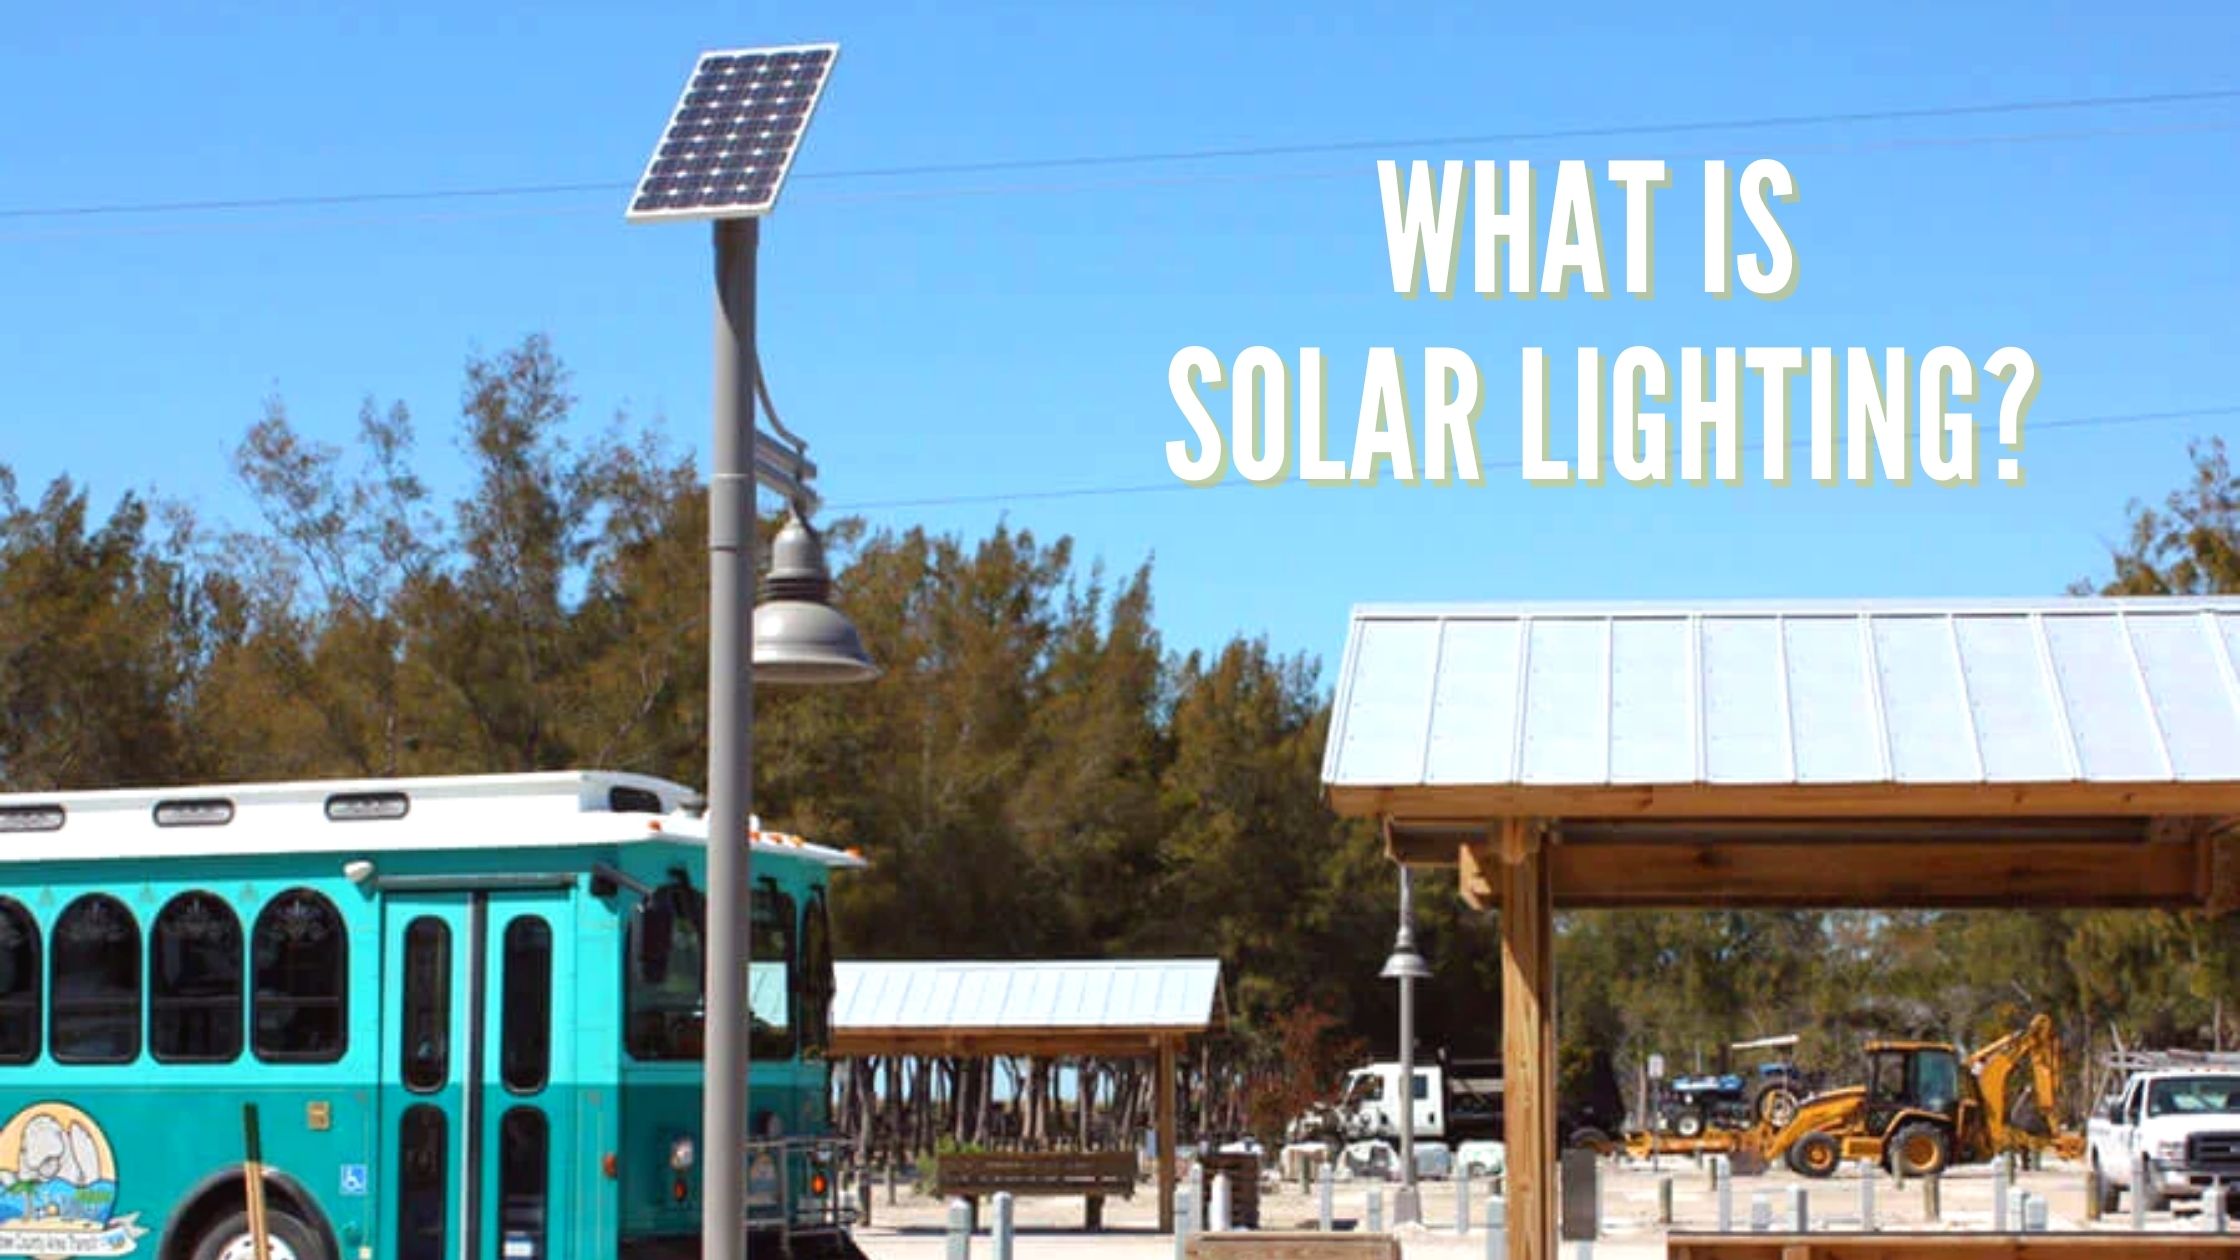
What is Solar Lighting?
Solar lighting can be thought of in many different ways. Either the sun is providing the light directly, like through a window or skylight, or capturing the sunlight for use at another time, like with photovoltaic lights.
Each of these ways to utilize the sun for our lighting needs has different variations, allowing you to find the perfect solution for your needs. For example, if you are lighting a space inside a home or building and are looking for a natural way to accomplish this, a solar skylight would be the best option.
If you are trying to provide light to an outdoor space at night, then off-grid solar lighting systems would be the best option. Within off-grid solar lighting systems, there are many variations that we will cover. In the end, I think you will have a better understanding of the various technologies, uses, and what would work best for your next installation.
Solar Sky Lights
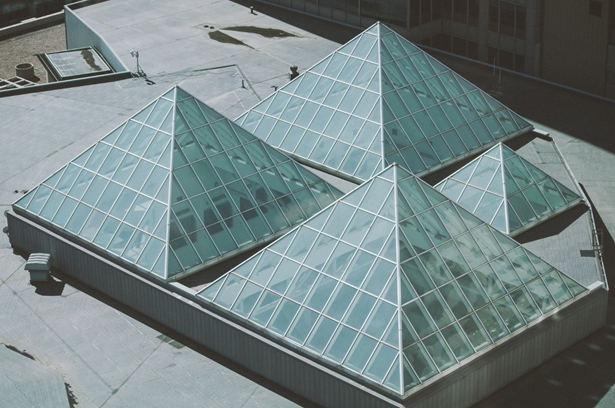
There are solar skylights that interact with the sun and clouds to dim and brighten indoor lighting.
There are also ones that bring in light with no way to dim except by using blinds.
Some skylights open to let out hot air and use solar energy to power the control arms.
Finally, solar tubes or sun tunnels can bring light to interior areas that may not have windows.
These various technologies are used to conserve energy, either by reducing HVAC use or allowing daylight to provide the required lighting to the space.
Some building light controls sense when the sun is available as natural daylighting and when it is not available, or cloud cover has formed, dimming the daylight. These controls then increase or decrease the use of electrical lights inside a building depending on the ambient light.
All these various options are used for indoor spaces, either with homes or commercial spaces. These costs vary from a couple of hundred dollars to over $10K for a complete purchase and installation. It is always less expensive to think of these setups during the beginning phases of a construction project and not long after the project is complete.
Photovoltaic Lights
The second and most common way we at SEPCO refer to solar lighting is an off-grid solar lighting system. These systems feature a photovoltaic (PV) module or array that collects energy from the sun and stores it in batteries to operate the required wattage of light at night.
This solar lighting system is generally used for energy savings, cost savings, and environmental reasons. These systems are called grid-free or stand-alone, meaning that they generate their own electricity at that specific site. No power is used from the grid, and no moving parts to worry about breaking.
One great benefit of these types of systems is it cuts down on construction costs of underground wiring. Instead of bringing power out to a site, dropping a meter, trenching the power out to all the various project locations, paying a monthly energy bill, renting the poles and fixtures, etc., you drop a pole and set everything in a single place. There are no energy bills for the systems, and the only maintenance is a battery change every so often, depending on your system.
This type of solar lighting works for small landscape and pathway lighting home installations, large-scale projects for manufacturing sites, parks and recreation, new construction, updating outdated sites, and everything in between.
Off-grid solar lighting systems allow the end-user to have light where they need it most, for as long as they need it to run. In addition, custom-designed systems provide a little more configuration than what you find in big box stores or online retailers.
Hybrid Solar Lights
The third technology gaining momentum in solar lighting is grid-interactive, sometimes referred to as hybrid systems. These systems have three meanings within their meaning.
One type of hybrid system is a system that generally only has solar modules and no battery. This system usually has a meter and what it generates while the sun is out goes directly into the grid. These are common among areas that utilities provide incentives for power generation. These systems are usually on a light pole but do not provide any power to operate the light. These systems are also sometimes referred to as peak reduction units.
The second hybrid system has a solar module and a battery with a lighting system. The solar generates the power, provides the energy collected into the battery, and operates the light for specific hours. Then the system switches back to grid power. This system is common where electricity is available at the pole, but the customer wants to offset the electricity costs. Either the light fixture needs to be bright, and the solar would have to be too large to operate it in a stand-alone fashion, or the pole exists and is limited on the number of batteries and solar that can mount to it.
The third hybrid solar lighting system is where 100% of the power generated can operate the light fixture. Still, for additional security, it would like the grid available to switch on if the weather does not keep up with the system.
So now that you know the main differences between the three main types of solar lighting, let’s go over some of the main pros and cons of off-grid solar lighting systems.
Pros and Cons of Solar LED Lighting
Solar-powered lights have become very popular within the last decade as fossil fuels have become more expensive. As a result, more companies and people are looking for ways to provide a sustainable/green alternative. As a result, solar LED lighting systems have come down in price over the last decade as solar becomes more popular and production costs are quickly lowering.
In general, solar lights have many advantages, such as an absence of power plugs and the simplicity of installation, but are solar-powered lights good enough to replace your readily available electrical lights? Let’s find out!
Here are some salient points about solar lighting:
Pros of Solar LED Lighting:
- Solar lights are the greener option because they do not run on electricity and therefore do not require standard electrical power
- Solar lights are easily installed and moved to the required location since all the wiring is located on the same pole
- Solar lights provide a gentle light since the power is limited and LEDs operate more efficiently off 12 or 24 VDC power than AC power
- Grants and Tax Incentives are still going strong to help lower the cost of solar (see www.dsireusa.org for more information)
- Each solar light operates independently from the next (except for certain applications such as signs, billboards, etc.)
- The low voltage provided by the solar panels is safe to work with and does not have the same hazards as AC lighting
- LEDs with directional lighting provide more light where it is needed and less where it is not
- Fixture styles are versatile to many different applications and architectural requirements
Cons of Solar LED Lighting:
- The color of solar light can be too blue with some style of LEDs, which does not compliment the landscape; however, understanding CRI will ensure you are not getting a light that is too blue
- Some less expensive units can be flimsy and not last as long as commercially designed systems; do research before purchasing.
- There is no solar power at night, so there is a need for a large battery bank to operate the lights; make sure you have the correct autonomy for your area.
- Depending on geographical location, the size of the solar panels varies for the same power generation due to available solar insolation in the winter.
The key to a good exterior solar lighting system is to get the maximum amount of light – or lumens – for the minimum electricity or Watts needed. This is tricky since some lights illuminate as a byproduct of heat and use lots of electricity (relatively speaking) to the amount of light produced, typically Metal Halide and Sodium lights. Remembering that brighter is not always better, nor is higher wattage vs. lower wattage. Having a lighting layout completed by a lighting engineer is the best way to ensure that any installed light meets the lighting requirements.
Uses for Solar LED Lighting Systems
Solar LED area lighting can be used for many applications ranging from a small single LED lights along a pathway to large overhead lights for roadways and parking lots. Each system should be designed for the specific application and to provide the required lighting levels. Good research on the project application, design work, and choosing the final product will ensure that the end-user gets exactly the type of system that perfectly fits their needs.

Small walkway lighting can be accomplished in multiple ways. The design, costs, and maintenance vary from small off-the-shelf lighting systems for home walkways to larger corporate walkways using higher-powered bollard fixtures. The off-the-shelf systems typically have their own solar panel and battery and are all included in each fixture. These systems are not high-powered but can outline the area they are placed along. Unfortunately, these systems require a lot of maintenance as their solar is only sized to provide a small amount of power with little to no backup from the battery, making the system use all available power nightly and reducing the battery lifespan dramatically, typically needing replacing every year or two.

Larger bollard fixtures can be installed in one of two ways; each having its own solar power system integrated within the bollard fixture or multiple bollards powered off a single large power array. The single bollards that each have their own solar power system provide a little better storage than the small big-box solar lighting systems; however, they will still require much more maintenance than a commercial lighting system. These systems have a flat panel on the top of each light requiring constant cleaning, especially in the northern snowy areas, and are more prone to vandalism. In addition, the batteries are typically only a couple of days backup, which still produces a short lifespan of a battery. Large solar arrays powering multiple fixtures will provide a longer-lasting system as there is typically a minimum of five nights autonomy. In addition, the solar is sized to replace the total usage every night in the worst-case scenario, winter.
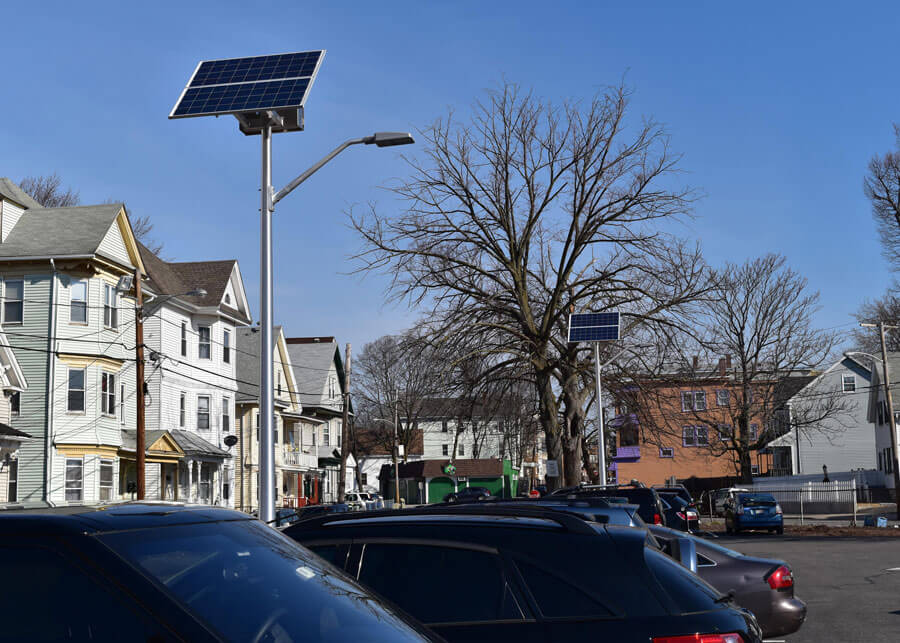
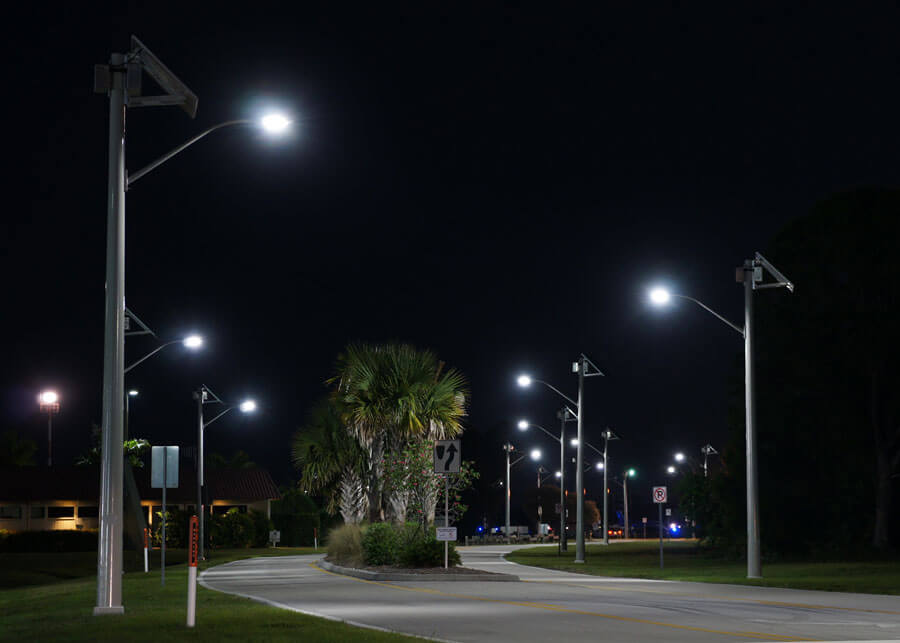
Other area lighting applications use larger fixtures such as floods and overhead light fixtures. These are much higher-powered systems and provide large area lighting for parking lots, streets, perimeters, etc. These systems each have their own solar power assembly to provide the power to the fixture and operate as specified by the end-user. These systems still need to be sized properly to ensure they are reliable and provide a long lifespan.
These larger projects have a considerable amount of customization options, and discussing the project's needs with the lighting designer will guarantee that the light specified for the project will meet the needs perfectly. Different distributions for different lighting applications can be used to customize the lighting system so that lighting is installed where needed and not wasted. Also, control options provide specific lighting needs, such as dusk to dawn or specific timing, even dimming options that can be considered. Always make sure that the lighting representative knows the end project requirements before specifying any custom control electronics.
Solar LED Light Fixtures Adapt to Needs
Why do we provide so many fixture choices? A solar lighting system utilizes multiple fixture types, and each fixture can be used for more than one type of application. Providing different options allows for customization of a system to provide the necessary lighting while staying with the customer's look. Here are some of the best examples:
Small Flood Solar Lighting Fixtures
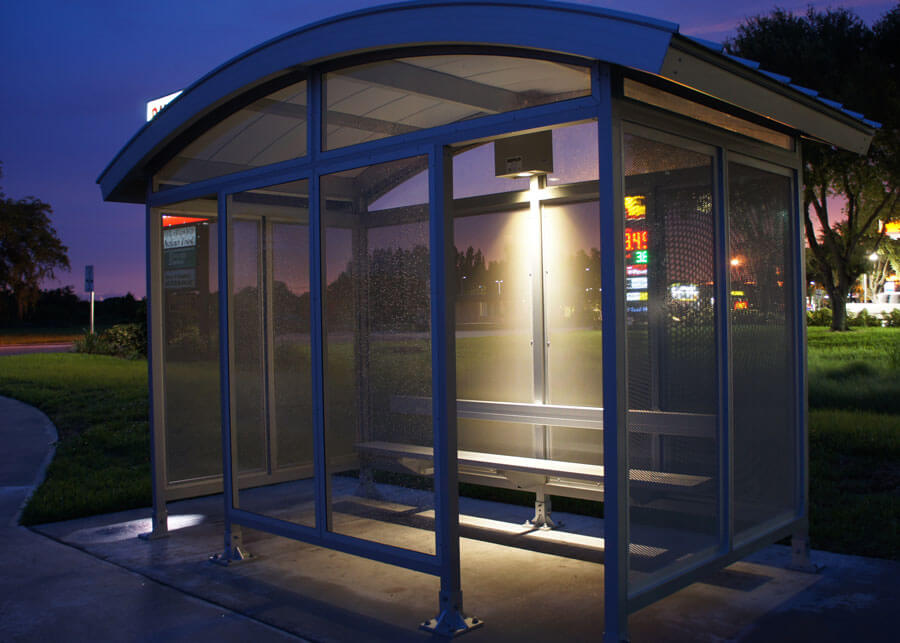
The small solar fixture can provide great lighting for smaller applications such as a sign light, bus stop, bus shelters, flags, area and landscapes, walkways, and so much more. This fixture has the ability to be used mounted on an enclosure or on its own mounted in fixture housing.
The picture shown is a great example of using this fixture in a bus shelter mounted within the battery assembly; however, the same fixture can be used for a bus stop light by just making a few adjustments to the overall system. This is definitely a very versatile fixture.
Other small flood fixtures are used for signs. A single flood fixture can cover a 10' square area; however, multiple fixtures can be powered by a single solar power assembly. This allows for larger monument signs to have a single solar power unit mounted nearby facing south with no care of the orientation of the fixtures or the sign. Again, these same fixtures can be used for other applications as well, such as landscape lighting.
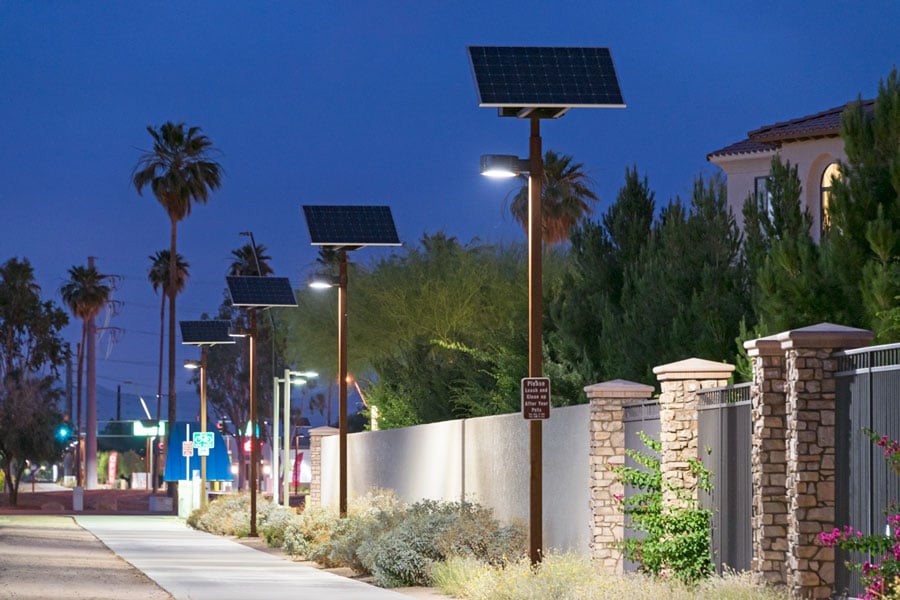
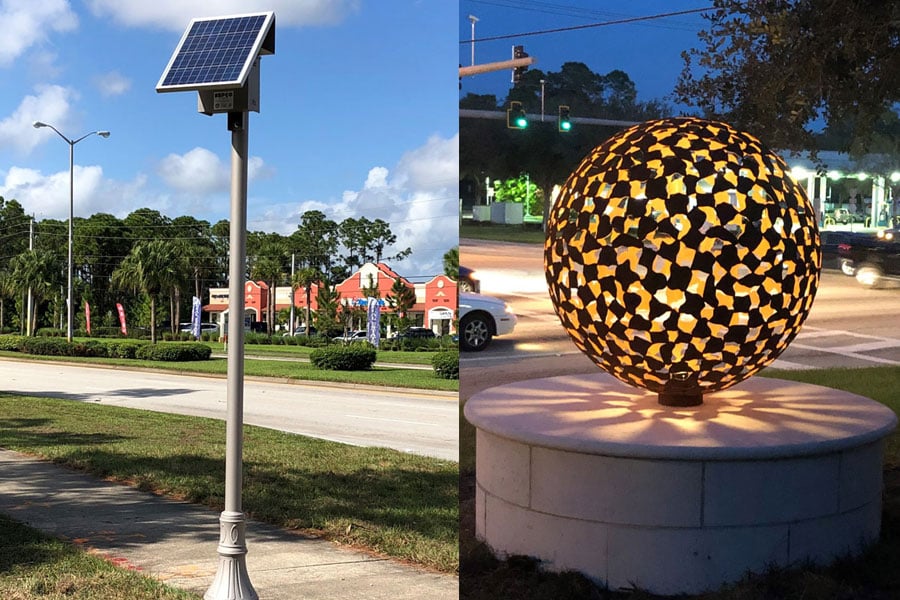
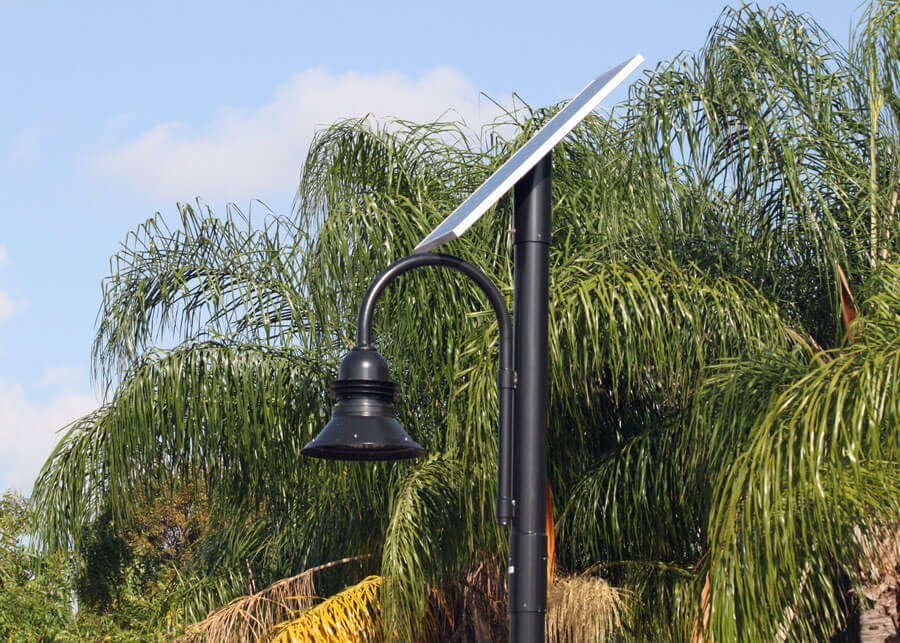
Large Decorative Solar Lighting Fixtures
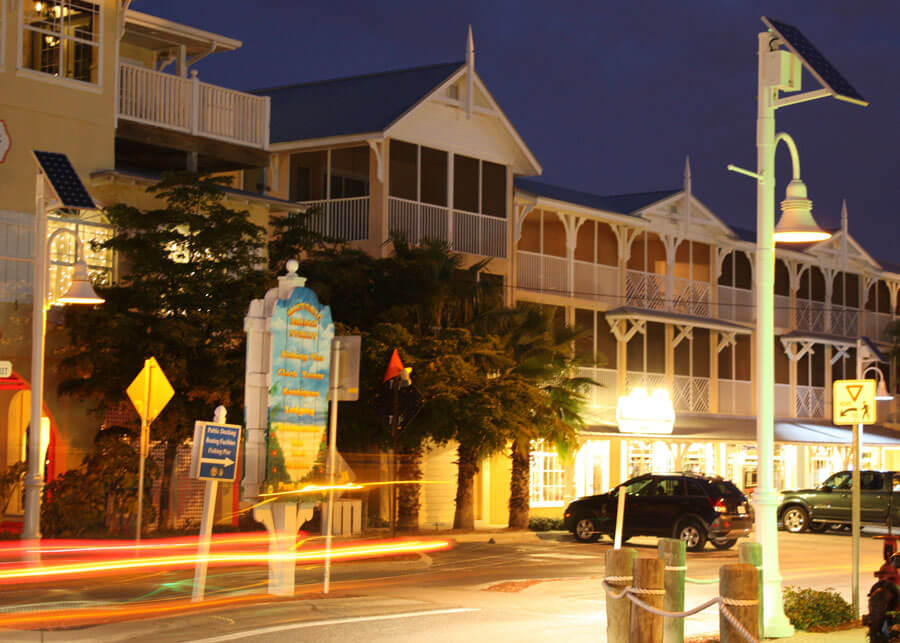
The various decorative solar fixtures are used for larger applications for roadways, walkways, parking lots, parks, areas, pavilions, and so much more. These decorative fixtures provide excellent lighting due to the LED technology. Some are dark sky compliant and can even be configured to be turtle-friendly with ease. These fixtures mount on the side of the pole using a decorative arm bracket allowing the solar to be installed above. They provide a range of optics and distribution patterns that allows for adaptive lighting to whatever the need of the project without losing light levels on the ground.
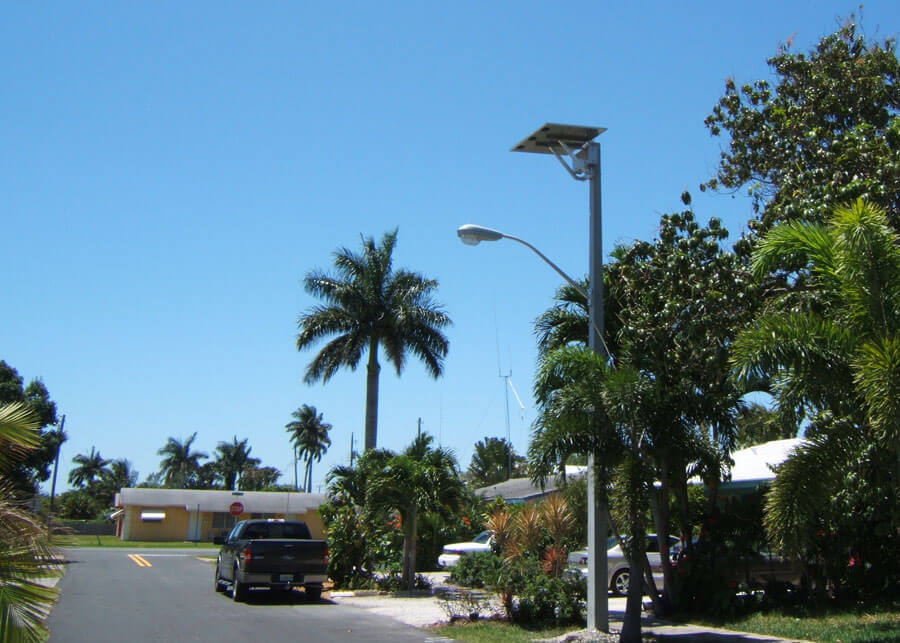
Standard Solar Lighting Fixtures
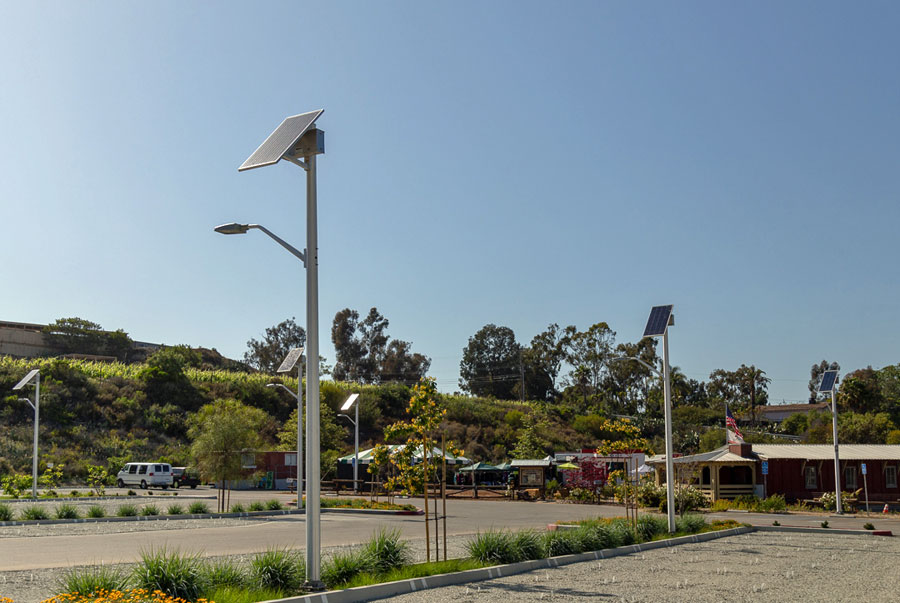
The Viper or Ratio fixture has great versatility. They are a great cross in style between a standard Cobrahead and Shoebox style fixture and easily can adapt to many different situations. These fixtures are typically used for roadways, parking lots, and area perimeter lighting; however, they can be used for just about all overhead lighting applications.
These fixtures provide light even at lower wattages and offer a wide range of optics and distribution patterns for adaptive lighting. The same fixtures can be used with different optics on different areas of the same project ranging from Type II to Type V Square distributions and many in between. Best of all, these fixtures are dark sky compliant, so all the light is pushed where you need it.
As every customer has a different application, customizing the fixture to the project's needs will provide the most efficient solar lighting system. There is no reason to use large floods on smaller applications, just like you wouldn't want a small, low wattage fixture to light up for security, roadway, or parking lots. Ensure your fixture does what you need it to do, or don't hesitate to ask for a different option. Your lighting designers are there to provide you exactly what you need for your project.
My Pole or Yours?

So you are looking to purchase and install a solar lighting system; however, you now have to decide if you should source a pole locally or get the one that the manufacturer can provide with the system. Poles sourced locally are typically lower in cost, and using existing poles on a job can lower the costs even more. BUT there are many differences between standard light poles and poles manufactured to deal with the added weight and EPA of the solar power assembly, most of which is typically mounted at the top of the pole.
Since poles can be a large expense of any solar light project, let’s go over the reasoning behind the costs associated with a pole provided by the manufacturer of the solar lighting system.
- The solar light poles that the solar lighting system manufacturer provides are typically specified to hold the weight of the solar power system. These poles are stronger and can tolerate more of a load than just any pole. Solar power assemblies range from around 150 pounds to over 500 pounds. SEPCO battery boxes are now designed to be mounted either up high or down low on the pole, providing the ability to bring most of the weight much lower than previous designs.
- They also provide additional support for the effective projected area (EPA) for wind loads in certain areas, especially along coastal areas where hurricane winds are more common. Certain areas require that a pole handle a specific EPA for a specific wind load, up to 170 mph in some areas. Customizing the system with a pole that can provide the strength to handle the wind events will ensure that your system will still be standing, even after a storm. We work with pole companies to ensure that the project installation location is considered with the sizing of the solar power assembly when specifying a pole to go with the system.
- The poles are built to last as long as the system operates, which can be 25 years or longer. However, I have seen poles needing to be replaced since they did not use quality poles in my local area on standard lighting systems. The amount of trenching and construction required to replace all these poles was just a waste, especially since the original poles were installed only a couple of years before. Providing quality poles, in the beginning, would have provided a much longer life than the five or so years these were installed.
There are many varieties of poles, and depending on the needs of your project, a custom pole option can easily be provided. From direct burial, anchor base, and transformer base poles to steel, aluminum, concrete, and even fiberglass; each pole can be designed to withstand the solar weight and EPA to provide a long-lasting system. Poles can also be powder coated to match the rest of the project.
Sometimes there are existing poles on a project. These poles are typically not a good idea as they are not built to withstand the additional weight of the solar. Instead, you can install the solar nearby on an additional pole or speak with the original pole company or structural engineer to decide whether this will withstand the additional weight and EPA. This is where a structural engineer can be very helpful if you determine to reuse the existing poles. The only possible exception to this would be wood or concrete poles.
If you want to source your own pole, make sure to ask your system engineer to provide you the weight and EPA of your system and pass this information along to your pole company. They will ensure that the pole will be manufactured to meet these requirements and your system will be standing for years to come.
How to Determine the ROI on Your Solar Lighting Project
The Return On Investment, or ROI, is one of the most critical aspects of determining if the solar lighting project you want to complete is better than standard electric lighting. This comparison can be one of the most challenging things to assess, but there is information that can help you determine the return of investment on the project. Here are some simple steps to help you find out what your payback period will be and the ROI of your project.
-
Determine the total cost of the project for solar
The first step is to determine the total cost of the project. This includes purchasing of the solar lighting systems, installation costs, and any other associated fees that may occur, like permitting. These should all be accounted for in the overall project cost.
You should also make sure you calculate any incentive to using solar that can be accounted for. This can include any Federal, State, and Local government incentives that are available. Other incentives can also be included with your local utility company.
-
Determine the total cost of the project for electrical
Just like the section above, make sure to total all the associated costs for going electrical. This includes the cost of the equipment and installation and the bringing in of the standard electric power, any meters, wiring, trenching, and other associated costs that come along with the electrical lighting systems.
-
Determine the current electrical rates
Current electrical rates need to be determined and figured for energy bills over the life of the lights. These do increase and should always include the standard inflation rate for accurate calculations. This is only used for the estimates of the electrical side of the project as the solar lighting systems have a life span of over 20+ years and do not require any electrical costs over their lifespan.
-
Determine the maintenance costs for electrical and solar
Both solar and electrical lights will require some maintenance over their lifespan. Solar will require battery changes every five to seven years or so. Occasional maintenance of inspecting and cleaning of system components may also be necessary but not standard.
Standard electrical lights need maintenance such as photocell replacements, lamp replacements, LED upgrades, wire connection checks, and any other routine maintenance that is required. These costs all should be added to the 20+ year lifespan of both setups.
Example ROI
Say the area requiring lighting calls for 5 lights. If your solar lighting project is a total of $27,500 and bringing in electricity for standard lighting is $12,500 for example, you would need the following formula to determine the ROI:
Solar: $27,500 Equipment – 26% Federal Tax Incentive = $20350 + $3750 Installation ($750 per pole for foundations and installation of equipment) = $24,100 + $12,000 Maintenance (battery changes every 5 years) = $36,100 total cost of project over 25 Years (remember, no electrical costs ever).
Electric: $13750 Equipment and Grid Extensions / Wiring / Trenching + $3750 Installation = $17500 + $11500 Electricity Costs (3% Inflation over 25 Years) = $29,000 + $12,500 Maintenance (photocell, lamps, fixture upgrades, etc) = $41,500 total cost of project over 25 Years.
Now to determine the ROI of the project: The initial investment of $24,100 vs $17,500 for the purchase of the systems and the installation shows a difference of $6,600 in the favor of electric; however, the next section can show where things start to change.
The average electrical usage is around 6 kWh per day used by five 100 Watt lights and the national average of electrical costs are 13.31 cents per kWh. That makes the average cost around $0.80 per day x 365 days per year, totaling around $291.50 per year for the five lights.
Over the five years, maintenance and electrical costs are $4922 for electrical lights and $3000 for solar lights. This leaves a difference of $1922 in favor of solar. Repeat this formula over the life of the solar and electrical, and this will continue to change. This example has an ROI of around 6-10 years or half the life of the solar lights. This formula also assumes that electricity is available nearby and there isn’t much for electrical installation to occur.
With so many vitiating factors, including other incentives that can reduce your solar lighting costs, speaking to your lighting specialist can help determine the exact ROI of your project.
Remember, there are always multiple factors that can change the return on investment on your project, but knowing all the costs going in each direction will help you determine what the best is for your money. If that doesn’t work, just remember, you are lighting up your world with free solar energy and providing a green option to your project.
*NOTE: The above example is just that, an example. Contact your lighting representative for your project costs and information.
Next time you are looking to light up an area and need a solar option, consult your solar lighting specialist to help you design the perfect system tailored to your specific needs. From big to small, solar LED lighting can be a great choice.
